 Everything comes from China products reviews site purchased in China
This is the second part of the tutorial “HOW TO MAKE AN APP FOR ANDROID”. If you got here and don't understand anything, so Click here to read the first part!
If you've already done the first part of the tutorial so you should have an application with a “EMPTY ACTIVITY” that simply writes “HELLO WORLD” on the screen of your phone or tablet. This is the beginning. Now let's see how we plan to make a calculator of roots of a quadratic equation, that is the purpose of this tutorial. I didn't know that? READ THE FIRST PART!
On the left side of the Android Studio you will find the list of files that your first program has. One of them, within the “RES/LAYOUT” is the calculadora.xml. This file contains the application layout, IE, all the settings and everything that your application will have on screen. Then click on the calculadora.xml file and open the DESIGN tab.
You then see a small cell phone, which is actually a simulation of one of the Google Nexus, and you can click in the text “HELLO WORLD”. Click the text, and then modify the contents in “TEXT” for “COEFFICIENTS”. We're just getting started!

Now add the LINEAR HORIZONTAL LAYOUT to your layout. The LINEAR LAYOUT is a layout-design in which the components appear next to each other (vertically or horizontally). Is one of the simplest types of layout and so was what I chose for this tutorial.

Then add 6 new components, 3 plain Textview (text labels) and 3 Edit Text (edit boxes for text entry). Note that the order in which the components appear in the ”Component Tree ” on the right of the screen below defines the way in which the components appear on the screen of the phone. Don't worry if the components are not appearing completely. They are there!
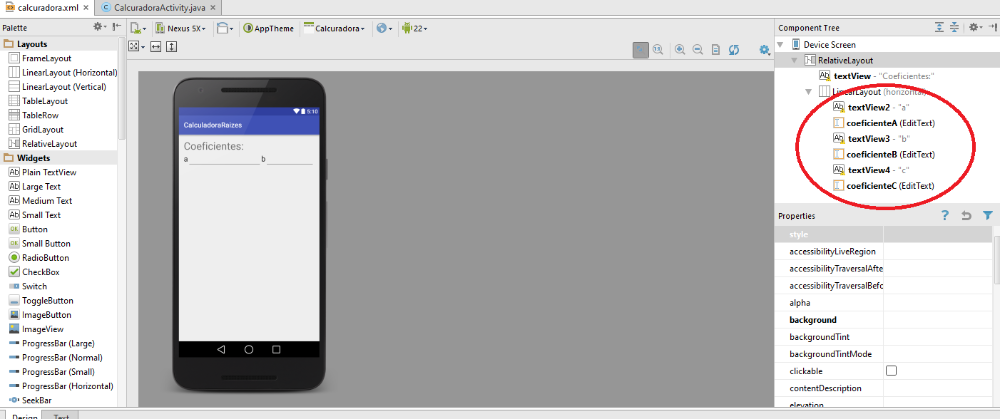
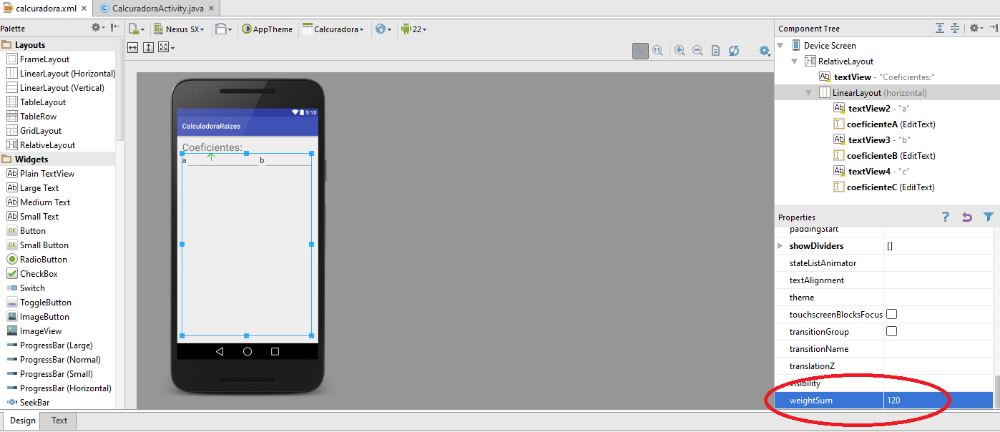
To make the components show up click the LAYOUT COMPONENT LINEAR TREE and look for the option WEIGHT SUM, putting the value 120. With this setting, we're asking for Android split screen in 120 parts (horizontally in the case of linear horizontal layout)
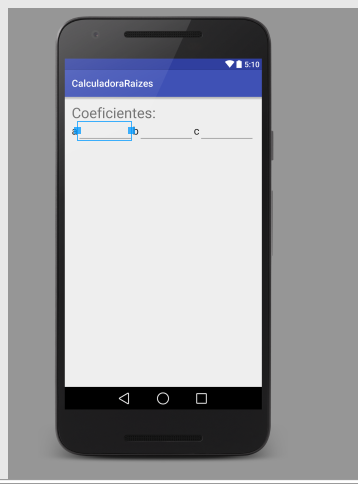
Now look for the option LAYOUT:WEIGHT of all components EDIT TEXT and set the value to 40. In this way, the screen is divided into 120 parts and each EDIT TEXT will 40 these parts. Change also the three TEXTVIEWs to “to”, “(b)” and “(c)”.
The three TextViews will get a piece of the fabric and the remainder will be divided equally by the three EDITTEXTs. The end result should look like this:
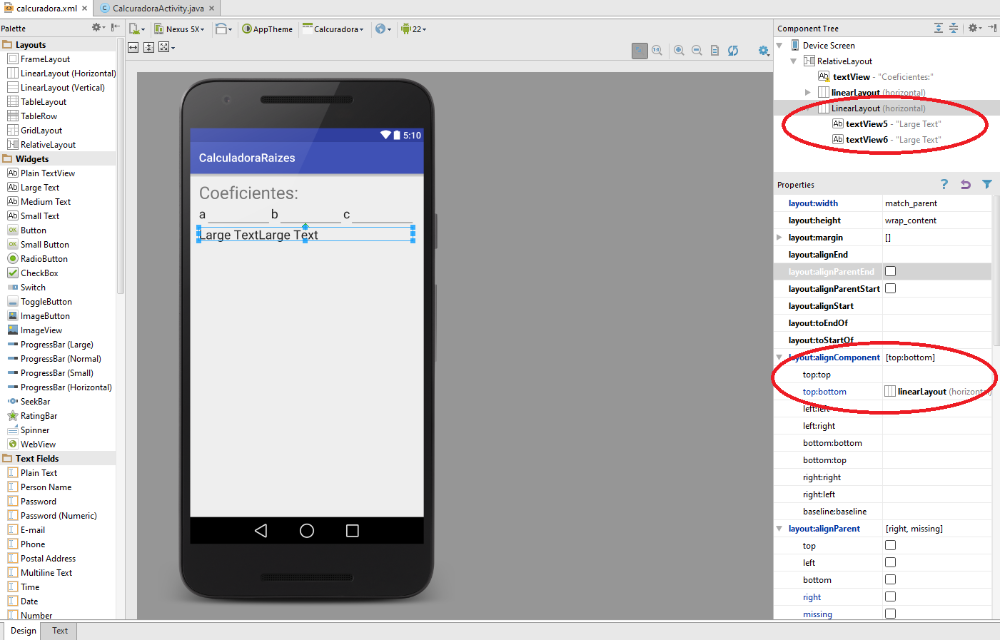
We will now add a new LINEAR HORIZONTAL LAYOUT and put two TEXTVIEWs in for the result (are two roots to the quadratic equation, Remember?).
For the second linear layout stay under the first linear layout with the coefficients, find the option “Layout:AlignComponent” and place TOP:BOTTOM to LinearLayout. Like this, the upper part of the linear layout of results (TOP) will be at the bottom (BOTTOM) the linear layout of results.
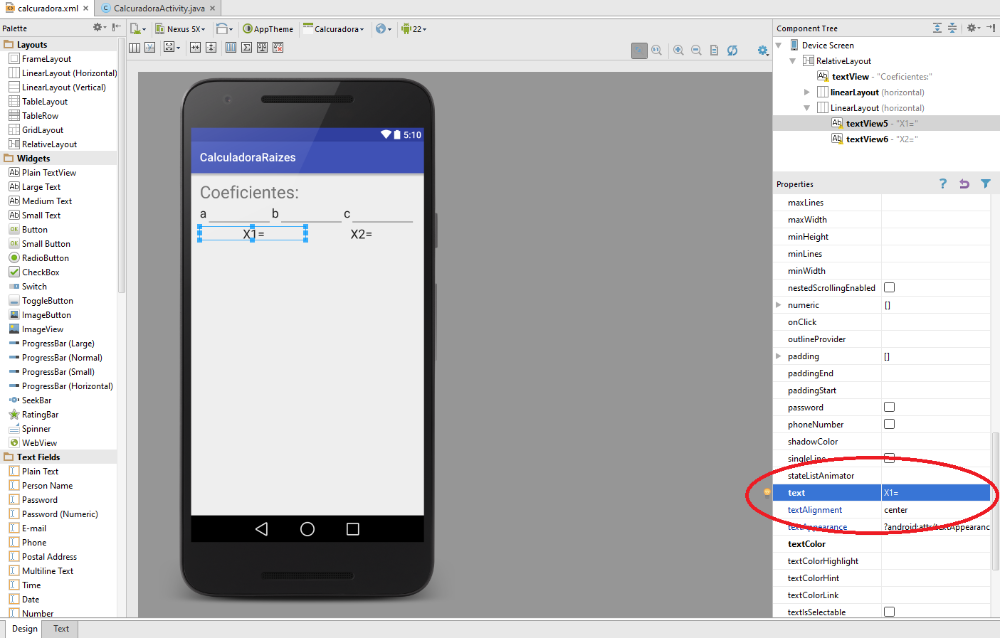
To leave a most beautiful effect, write “X 1 =” and “X 2 =” the two textview of reply and set the textalignment to center.
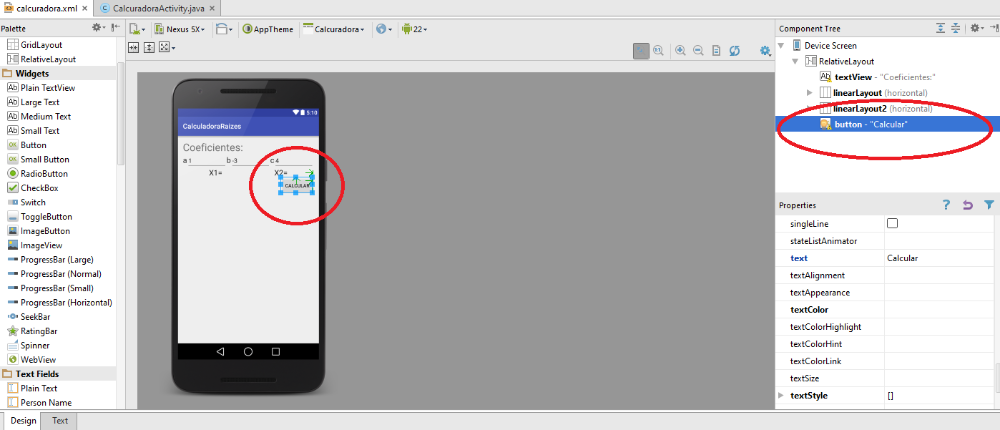
Now place a button, that will serve to make the calculation. Change the name of the button to “calculate”!
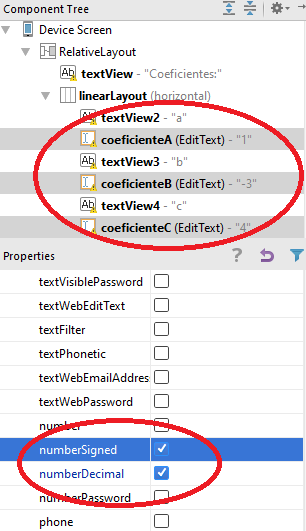
Before we leave for the code, don't forget to change the ID of the component to make it easier to find in the code. For the EDITTEXT coefficients, write coeficienteA, coeficienteB and coeficienteC. Also enable the options below “numberSigned” and “numberDecimal” in type to configure the Android keyboard to enter only numbers.
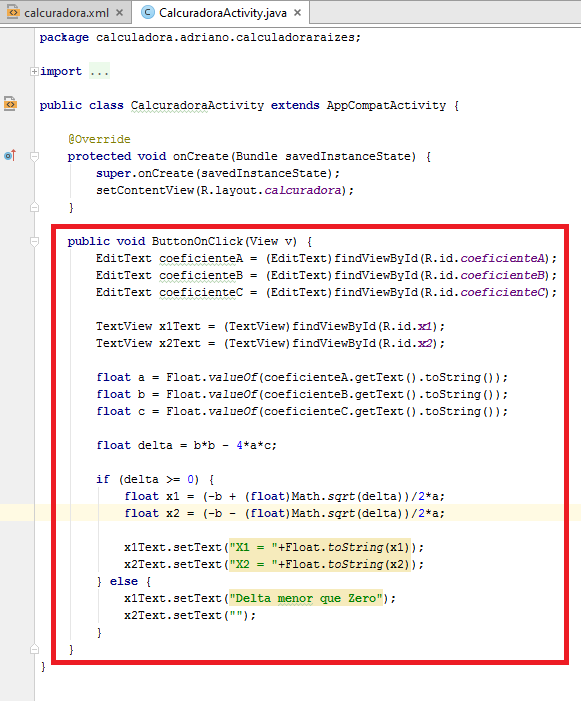
Let's get to the code now. Click calculadoraActivity.java and put this code just below the key which closes the protected void Oncreate:
public void ButtonOnClick(View v) {
EditText coeficienteA = (EditText)findViewById(R.id.coeficienteA);
EditText coeficienteB = (EditText)findViewById(R.id.coeficienteB);
EditText coeficienteC = (EditText)findViewById(R.id.coeficienteC);TextView x1Text = (TextView)findViewById(R.id.x1);
TextView x2Text = (TextView)findViewById(R.id.x2);float a = Float.valueOf(coeficienteA.getText().toString());
float b = Float.valueOf(coeficienteB.getText().toString());
float c = Float.valueOf(coeficienteC.getText().toString());float delta = b*b – 4*a*c;
If (delta >= 0) {
float x1 = (-(b) + (float)Math.sqrt(delta))/2*to;
float x2 = (-(b) – (float)Math.sqrt(delta))/2*to;x1Text.setText(“X 1 = “+Float.toString(x1));
x2Text.setText(“X 2 = “+Float.toString(x2));
} else {
x1Text.setText(“Delta less than Zero”);
x2Text.setText(“”);
}
}
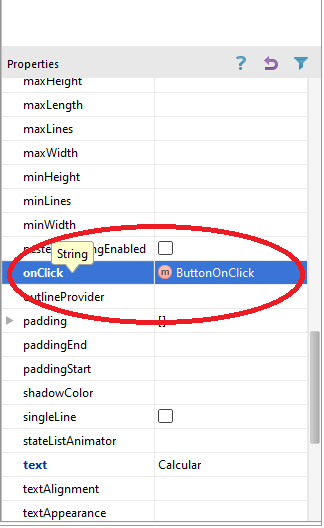
Depois de colocado o código, you will see the option to change the onClick of the button to run the code that include when someone clicks (play) the button.
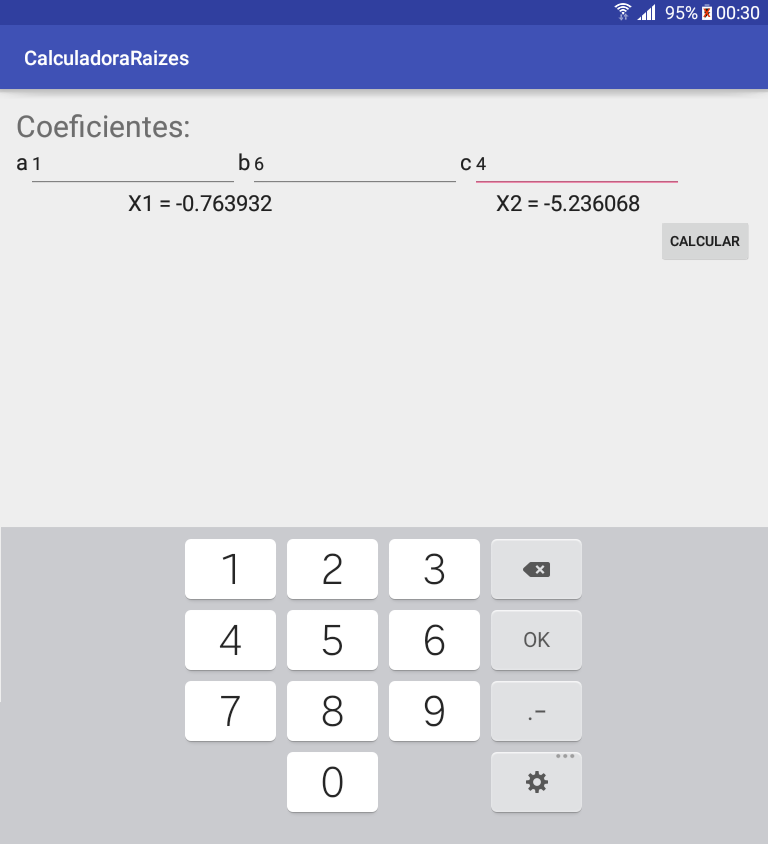
And there's our creation working! Press SHIFT-F10 to view running on your tablet or mobile phone.
Now just take this example and modify to do what you want. If you click TOOLS->GENERATE SIGNED APK may generate a package from your useful program and send to Google Play! Who got a bit lost with the explanation you can download the complete package with the program source via the link below! Good luck and good programs!
http://www.tudovemdachina.com/uploads/programas/calculadoraraizes.zip